如何优雅地管理自己的小电影
本文最后更新于:2023年2月20日 中午
前言
⭕未满 18 岁请勿阅读!!
废话少说直接进入正题,本文采用的是用 AV Data Capture + Plex 的方案。
🔹建议在 Debian 10 或Ubuntu 20.04上进行。
🔹所有形如 [foobar] 的均需要你自己替换成正确的路径。
影片整理
元数据
元数据 (metadata) 即影片信息:如影片封面 / 影片标题 / 发行时间 / 影片简介 / 制作公司 / 演员表 /Staff 表。
越是完善的 元数据,导入 Plex/Emby 等本地媒体库后就越是美观便利。
就像这样:
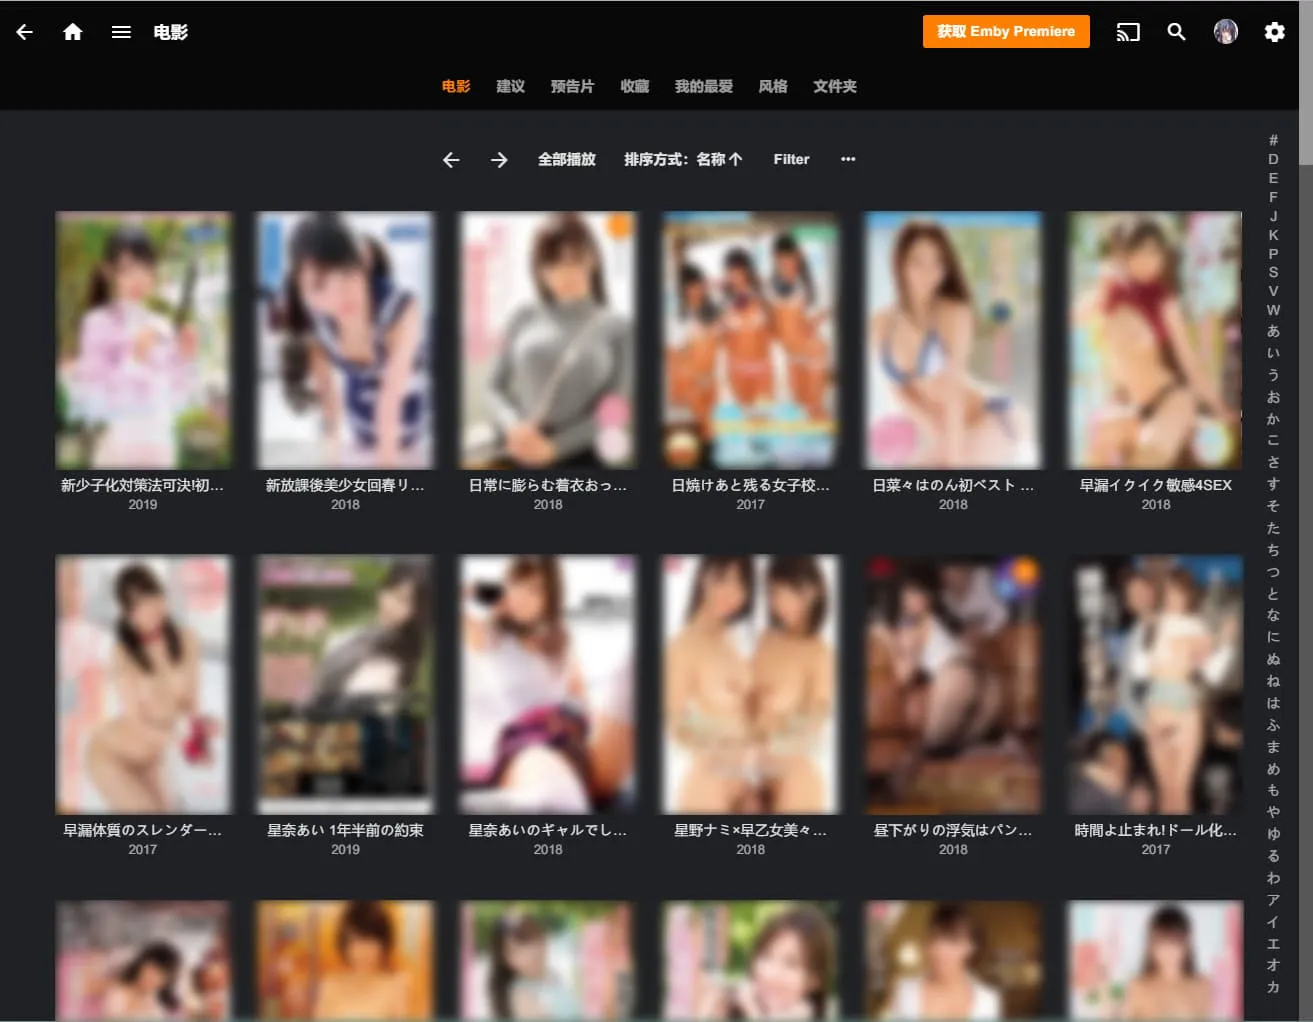
而 Plex 自带的刮削器,或者即使使用第三方的,都功能不够完整,所以我推荐先将元数据刮削好,存入 .nfo 文件中,直接导入 Plex 中。
AV Data Capture
大多数情况下我们的小电影都存在 Google Drive 中,所以可以用 rclone 挂载,然后进行刮削。
将项目克隆到本地(自行安装 Git)
我使用的是 Python 源码版。
git clone https://github.com/yoshiko2/AV_Data_Capture安装依赖:
cd AV_Data_Capture && pip3 install -r requirements.txtrclone 挂载 Google Drive:
安装rclone:
curl https://rclone.org/install.sh | sudo bash挂载 Google Drive:
建议先申请自己的 client_id 和client_secret,因为挂载 IO 是需要大量请求的,具体流程可以参考 该文章 ,并且完成rclone config 的配置。
然后进入 AV Data Capture 的目录并挂载。
apt install fuse -y && cd AV_Data_Capture && mkdir gd
rclone mount [DriveName]:[Folder] gd \
	--umask 0000 \
	--default-permissions \
 	--allow-non-empty \
 	--allow-other \
 	--transfers 4 \
 	--buffer-size 32M \
 	--low-level-retries 200 \
	--dir-cache-time 12h \
	--vfs-read-chunk-size 32M \
	--vfs-read-chunk-size-limit 1G &
🚨此处出现以及之后所有的 [DriveName] 和[Folder]须替换为 需要刮削的的网盘名 和文件夹路径。
刮削元数据
注意要修改 config.ini 文件:
[common]
main_mode=1
failed_output_folder=gd/failed
success_output_folder=gd/JAV_output
soft_link=0
failed_move=1
auto_exit=1
transalte_to_sc=0

[proxy]
switch=0
type=http
proxy=127.0.0.1:1080
timeout=5
retry=3
cacert_file=

[Name_Rule]
location_rule=year+'/'+actor+'/'+number
naming_rule='['+number+']'+title
max_title_len= 50

[update]
update_check=1

[priority]
website=airav,javbus,javdb,fanza,xcity,mgstage,fc2,avsox,jav321,javlib,dlsite

[escape]
literals=\()/
folders=gd/failed,gd/JAV_output

[debug_mode]
switch=0

[transalte]
switch=0
engine=google-free
key=
delay=1
values=title,outline

[trailer]
switch=0

[uncensored]
uncensored_prefix=S2M,BT,LAF,SMD


[media]
media_type=.mp4,.avi,.rmvb,.wmv,.mov,.mkv,.flv,.ts,.webm,.iso
sub_type=.smi,.srt,.idx,.sub,.sup,.psb,.ssa,.ass,.txt,.usf,.xss,.ssf,.rt,.lrc,.sbv,.vtt,.ttml

[watermark]
switch=1
water=2

[extrafanart]
switch=0
extrafanart_folder=extrafanart
开始在后台整理:
apt install screen -y && screen -S AV
python3 AV_Data_Capture.py
接下来就只用慢慢的等他刮削好,刮削成功的片就会在 JAV_output 目录下,并按照演员归类好。
CTRL+A+D可以退出该窗口,直接关闭也可以;screen -r AV回到该窗口。
如果刮削完想要卸载之前挂载的文件夹,可以用如下命令:
fusermount -uz gd进阶步骤(可选)
验证刮削好的影片的完整性
这里我用到了 rclone tree 来生成文件树,建议在服务器上执行以下命令:
rclone tree [DriveName]:[Folder]/JAV_output > tmp.txt安装 PyYAML 库:
pip3 install PyYAML然后用以下 Python 脚本来提取出我们需要的信息:
import re
import yaml

with open('tmp.txt', 'r', encoding='UTF-8') as f:
    tmp = f.readlines()

av_dict = {}

for t in tmp:
    matched = re.match(r'.* ([0-9a-zA-Z]+(?:-[0-9a-zA-Z]+)?)\n.+\.\w{2,4}', t)
    if matched:
        t = matched.group(1)
        fh = str(t).upper()
        av_dict.setdefault(fh, [])
    else:
        matched = re.match(r'.* ((FC2-[0-9]+|[0-9a-zA-Z]+(?:-[0-9a-zA-Z]{2,4})?)(?:-fanart\.\w{2,4}|-poster\.\w{2,4}|-thumb\.\w{2,4}|\.\w{2,4}|-.+?\.\w{2,4})$)', t)
        if matched:
            t = matched.groups()
            fh = str(t[1]).upper()
            av_dict.setdefault(fh, [])
            av_dict[fh].append(t[0])

with open('Extra.yaml', 'w') as f:
    yaml.dump(av_dict, f, encoding='UTF-8')
这样就会以
Number:
- file1
- file2
- file3
- file4
- file5
的形式将文件结构储存到 Extra.yaml 文件中。
然后再用以下 Python 脚本来进行文件验证:
import re
import yaml

def load(file):
    with open(file, 'r', encoding='UTF-8') as f:
        a = yaml.safe_load(f)

    a_lower = {}
    for k, v in a.items():
        a_lower[str(k).lower()] = v

    return a_lower

def val(ad = {}, al = {}):
    a_list = []
    ignore = []
    ignore = [ str(x).lower() for x in ignore ]
    for l in ad:
        try:
            if len(ad[l]) < 5 and l.lower() not in ignore:
                print(l, 'Lack things!')
            else:
                flag = True
                for a in ad[l]:
                    if re.search(r'.*\.(mp4|avi|rmvb|wmv|mov|mkv|flv|ts|webm)', str(a).lower()):
                        flag = False
                if flag:
                    print(l, 'No video!')

                if l in a_list:
                    print(l, 'Duplicate!')
                else:
                    a_list.append(l)

                if al:
                    if l in al:
                        print(l, 'Existed!')
        except:
           print(l, 'Error!')

def export(file, a = {}):
    with open(file, 'w') as f:
        f.writelines([ x + '\n' for x in a.keys()])

# t = load('tmp.yaml')

a = load('Extra.yaml')

# val(t)

val(a)

# val(t, a)

export('existed.txt', a)
这样就能看到文件不全的番号,并将所有番号储存进 existed.txt 文件中。
在上一次刮削的基础上进行新的刮削
我们往往不希望在转存了(大佬们的)新的影片到自己的 Google Drive 中后,还要对能在自己影片库找到的影片进行二次刮削,所以我们就用到了 existed.txt 文件,这也是为什么我要用源码版。
修改源码:
在 AV_Data_Capture.py 文件中
create_data_and_move函数添加:
def create_data_and_move(file_path: str, c: config.Config, existed: list):
    # Normalized number, eg: 111xxx-222.mp4 -> xxx-222.mp4
    n_number = get_number(file_path)

    if n_number.lower() in existed:
        print('Existed!')
        return
	...
并将主函数中使用该函数的位置改成:
create_data_and_move(movie_path, conf, existed_list)- 传参函数
argparse_function添加:
parser.add_argument("-e", "--existed", default='existed.txt', nargs='?', help="The file Path of the list of existed videos.")这样我们就能很方便的使用 existed.txt 文件:
python3 AV_Data_Capture.py -e existed.txtPlex
PlexDrive 挂载
首先挂载刮削好的文件夹,推荐用PlexDrive,针对于流媒体专门进行了优化。
使用起来很简单,是一个二进制文件,先在 Release 中下载并解压,然后挂载即可:
# 首先要安装 fuse
apt install fuse -y
./plexdrive mount [DstFolder] \
	-c /root/.config/plexdrive -o allow_other,max_readahead=131072 -v 3 \
    --cache-file=/root/.config/plexdrive/cache.bolt \
    --chunk-size=10M --max-chunks=8 \
    --root-node-id=ROOT_ID \
    --umask=000
🚨此处出现以及之后所有的 [DstFolder] 须替换为 需要挂载至的本地文件夹路径。
❗注意:
- 使用团队盘时务必加上
--drive-id=DRIVE_IDDRIVE_ID,ROOT_ID为需要挂载的 Google Drive 文件夹的 ID,具体可参考项目Readme。 client_id和client_secret可以使用上个步骤申请的。- 在后台运行可以用
nohup等,建议使用systemd管理,在下一个步骤进行。
等待缓存结束后先断开PlexDrive。
Plex 导入
Plex 建议用Docker 版:
Docker和 Docker Compose 的安装可参考 该文档。
version: "2.1"
services:
  plex:
    image: linuxserver/plex
    container_name: plex
    network_mode: host
    environment:
      - PUID=1000
      - PGID=1000
      - VERSION=docker
      - UMASK_SET=000
    volumes:
      - [config]:/config
      - [DstFolder]:/tv
    restart: always
🚨此处出现以及之后所有的 [config] 须替换为Plex 保存配置的文件夹。
保存上述到文件 docker-compose.yml 并执行docker-compose up -d。
由于 Plex 初次启动只有在同一个子网下才能发现,如果是在 VPS 上搭建的,需要先连接到该子网下:
- 在你的本地电脑下:
ssh user@VPS_IP -p SSH_PORT -L 8888:localhost:32400- 浏览器中打开
http://localhost:8888/web进行进一步设置。 - Plex 需要安装
XBMCnfoMoviesImporter插件,将 项目 下载下来,解压并重命名文件夹为XBMCnfoMoviesImporter.bundle, 然后放在config/Library/Application Support/Plex Media Server/Plug-ins文件夹中即可,记得重启 Plex。
PlexDrive 开机自动挂载
创建文件/etc/systemd/system/plexdrive.service,写入如下内容:
[Unit]
Description=PlexDrive
AssertPathIsDirectory=[DstFolder]
Wants=network-online.target
After=network-online.target

[Service]
Type=simple
ExecStart=[plexdrive] mount [DstFolder] -c /root/.config/plexdrive -o allow_other,max_readahead=131072 -v 3 --cache-file=/root/.config/plexdrive/cache.bolt --chunk-size=10M --max-chunks=8 --root-node-id=ROOT_ID --umask=000
ExecStartPost=[docker] restart plex
ExecStop=[fusermount] -uz [DstFolder]
ExecReload=[fusermount] -uz [DstFolder] && [plexdrive] mount [DstFolder] -c /root/.config/plexdrive -o allow_other,max_readahead=131072 -v 3 --cache-file=/root/.config/plexdrive/cache.bolt --chunk-size=10M --max-chunks=8 --root-node-id=ROOT_ID --umask=000
Restart=on-abort

[Install]
WantedBy=default.target
🚨此处出现的 [plexdrive]、[docker] 和[fusermount]最好替换为 二进制文件所在的位置,可以用whereis 查看;其他同上。
❗注意:如果 CPU 或内存占用过高,可以根据 该 Issue调整。
然后启用服务:
sudo systemctl daemon-reload
sudo systemctl start plexdrive.service
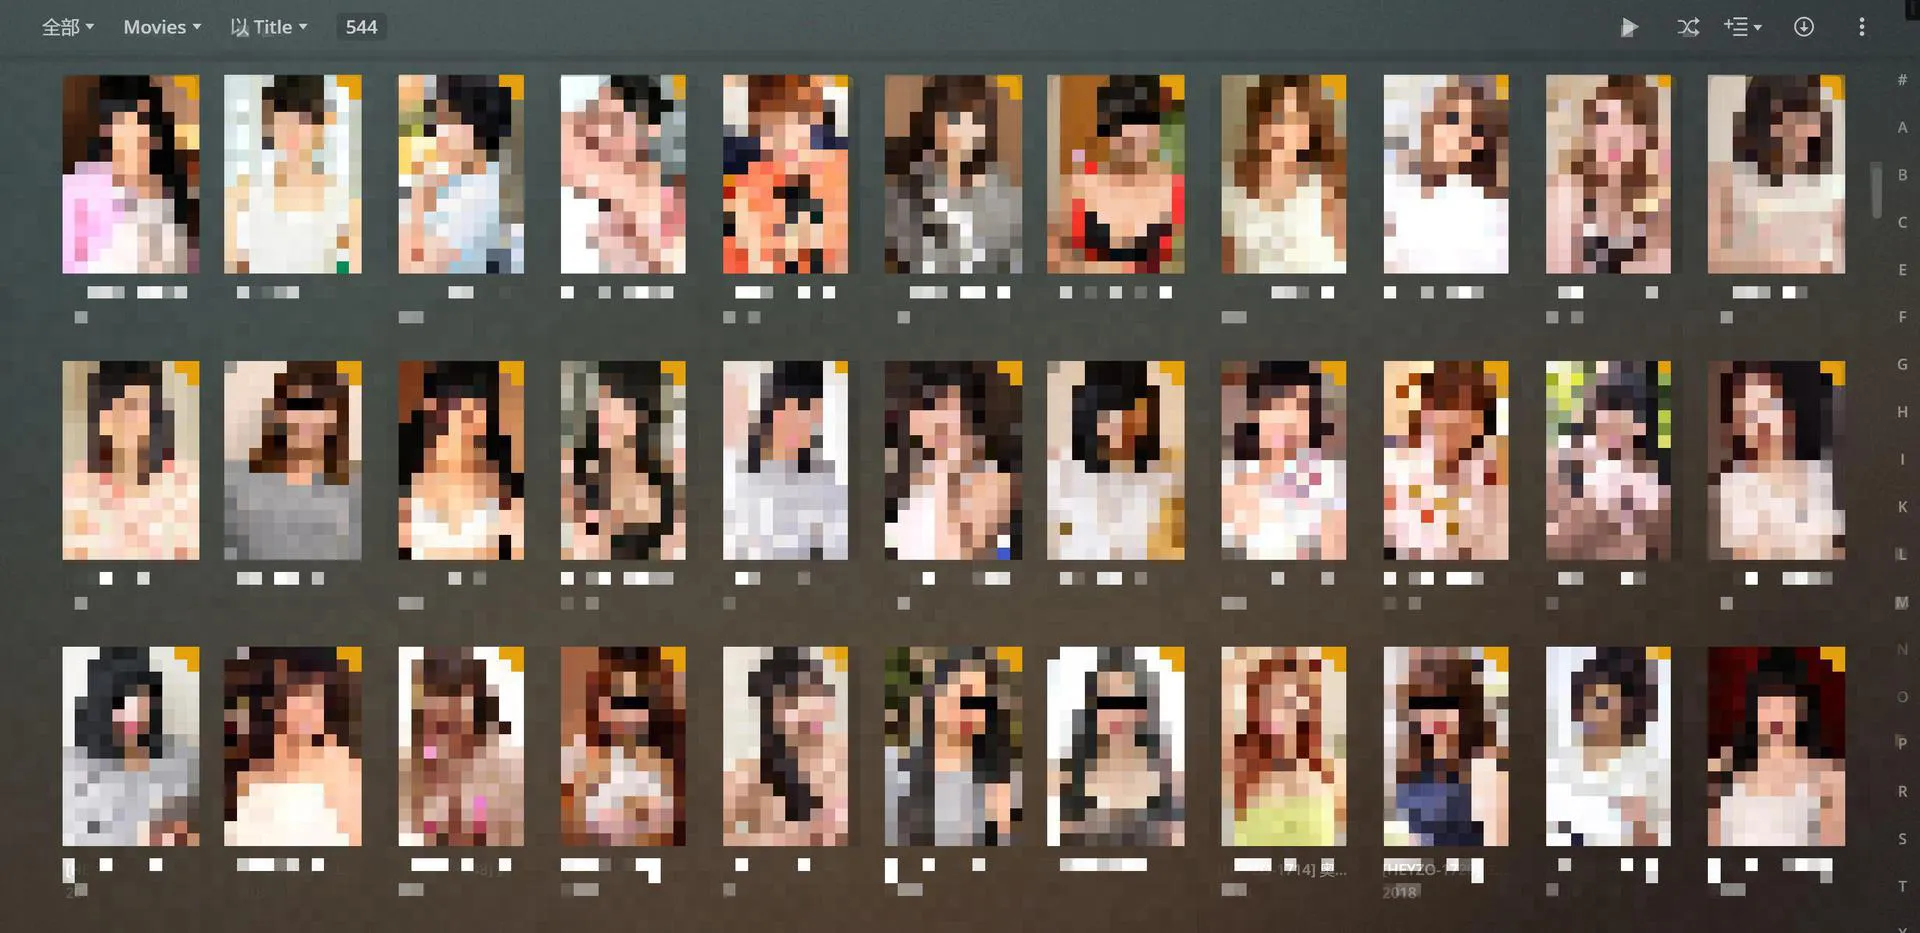
sudo systemctl enable plexdrive.service最后在 Plex 添加资料库,并等待其扫描完文件,就能愉快的玩耍啦~
最终的效果图如下:
后记
本文章的方案可以搭建在一台配置一般但是速度快的 VPS 上,因为 Plex 现在已经支持本地解码,不需要服务端来进行解码。
同时要注意如果你的影片过多,Plex 会产生较大的文件,建议预留 40G 以上的空间,或者根据 此文章 进行改进。